HITBAMS 2019 Eighties Writeup
Tags: ctf - binary - reverse-engineering
In this write-up we will discuss our approach to solving the eighties binary challenge created by Blasty.
Shoutouts to everyone who played the #HITB2019AMS CTF. I was the author of the following tasks: shareware, seventies, eighties, untimely. Let me know if they were any fun. :)
— BLASTY (@bl4sty) May 12, 2019
If you want to follow along, you can grab a copy of the binary here.
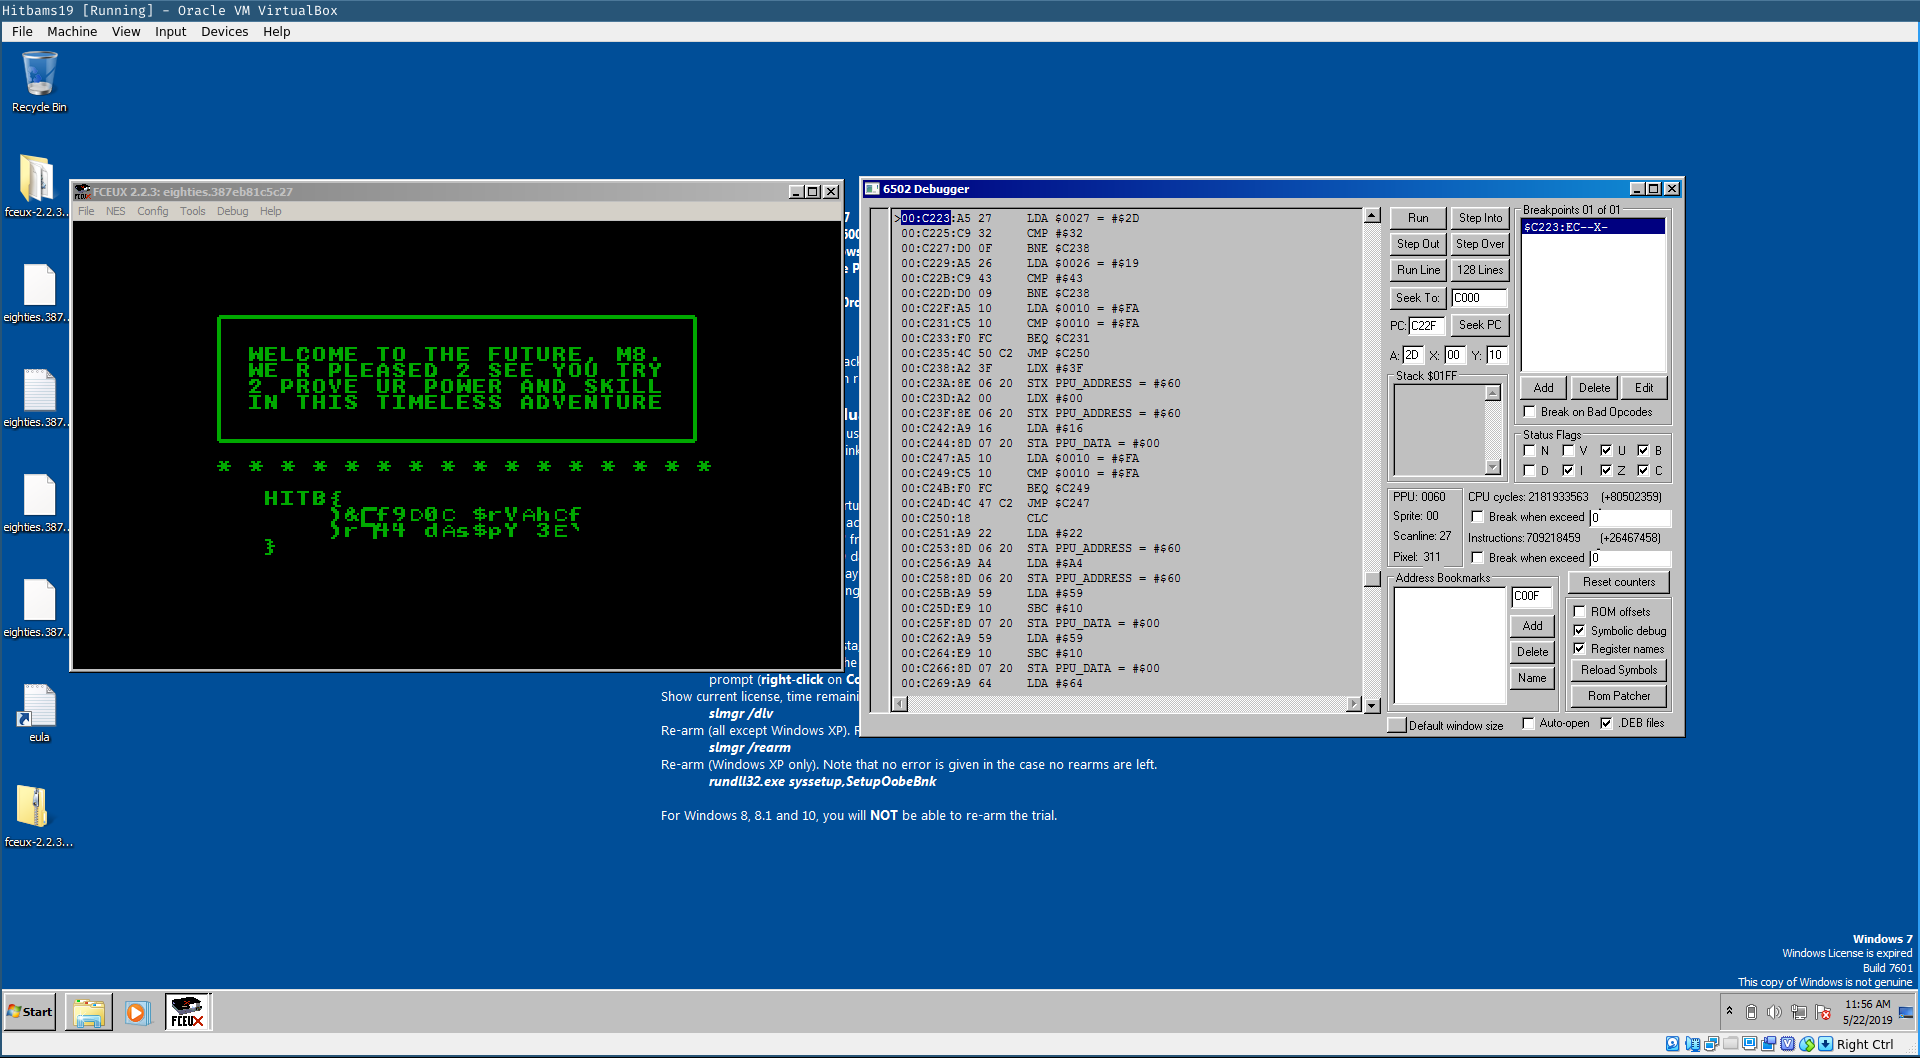
The first step is to run the NES ROM to see what it expects. We ended up using the Windows version of the FCEUX NES emulator because it has debug capabilities. Initially, we started building the FCEUX emulator from source because the version provided by Debian lacked debugging capabilities, but for some reason it is a Windows only option.
The following screenshots shows the message we get when starting the ROM.
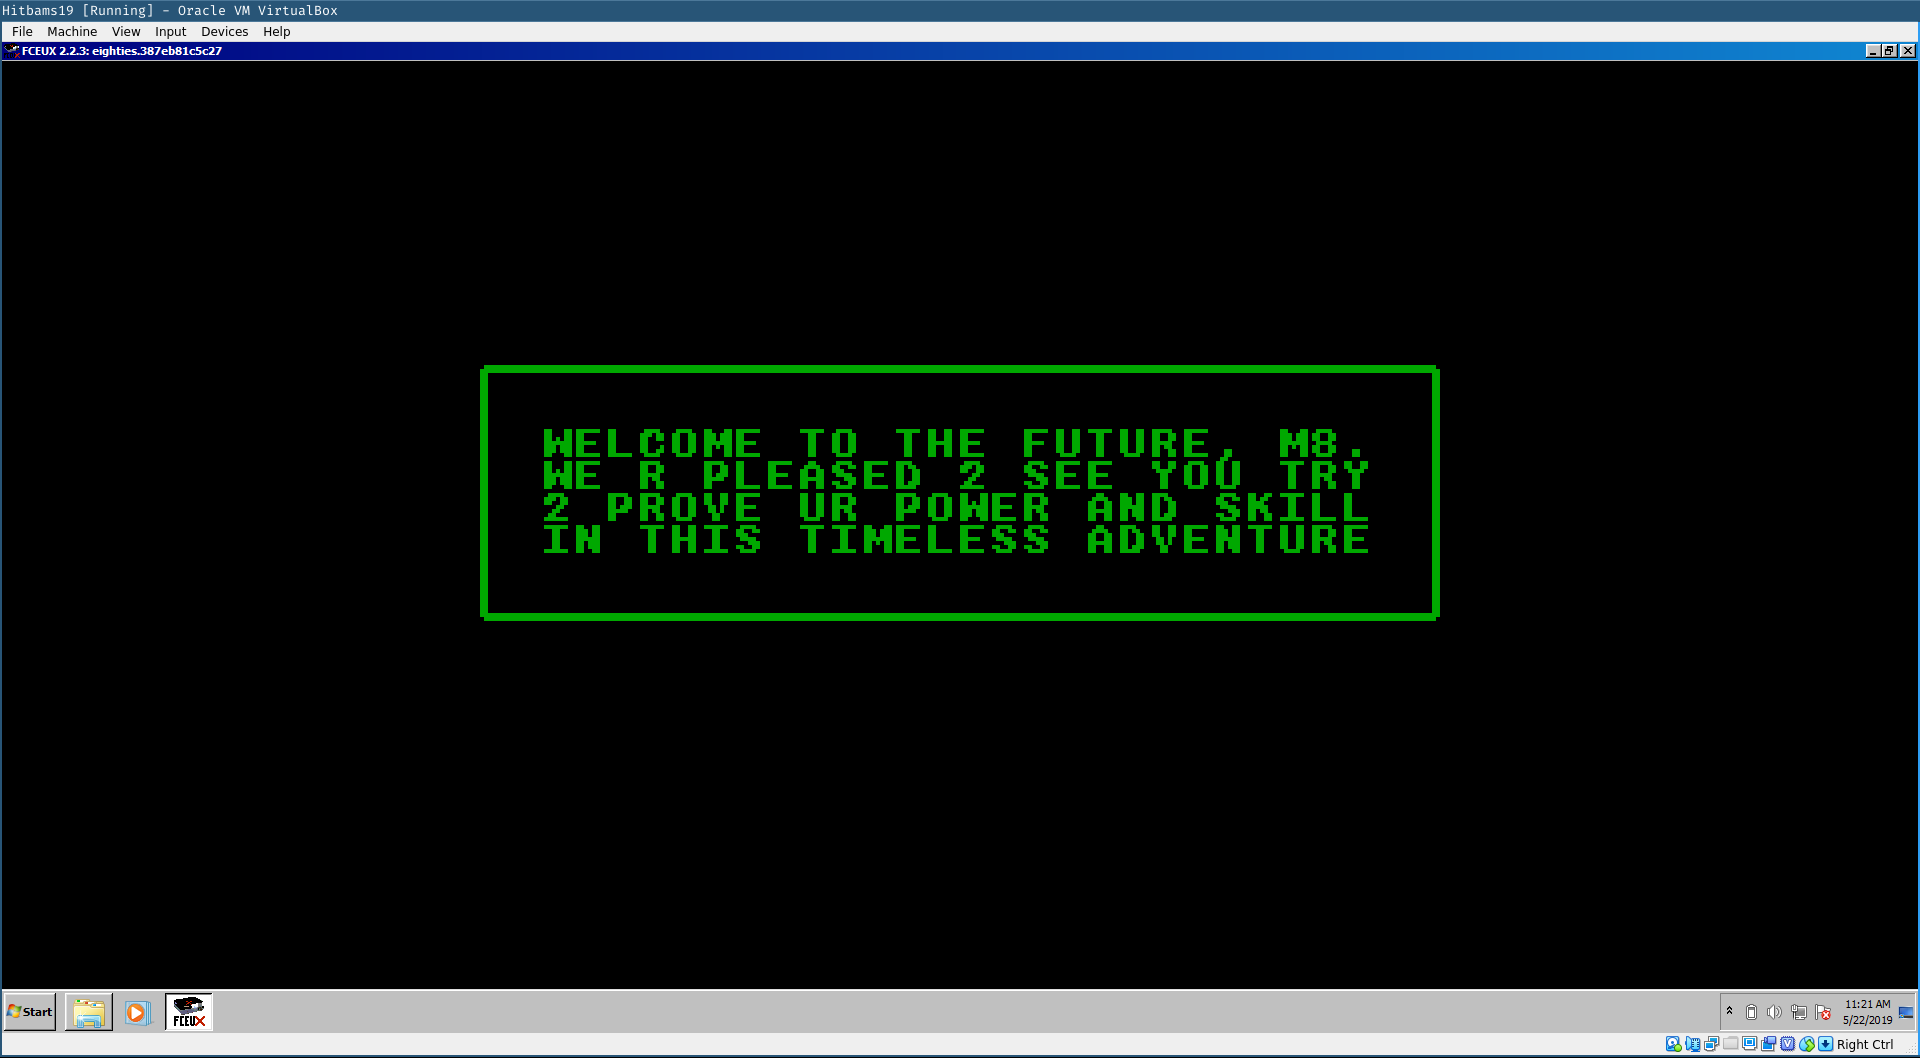
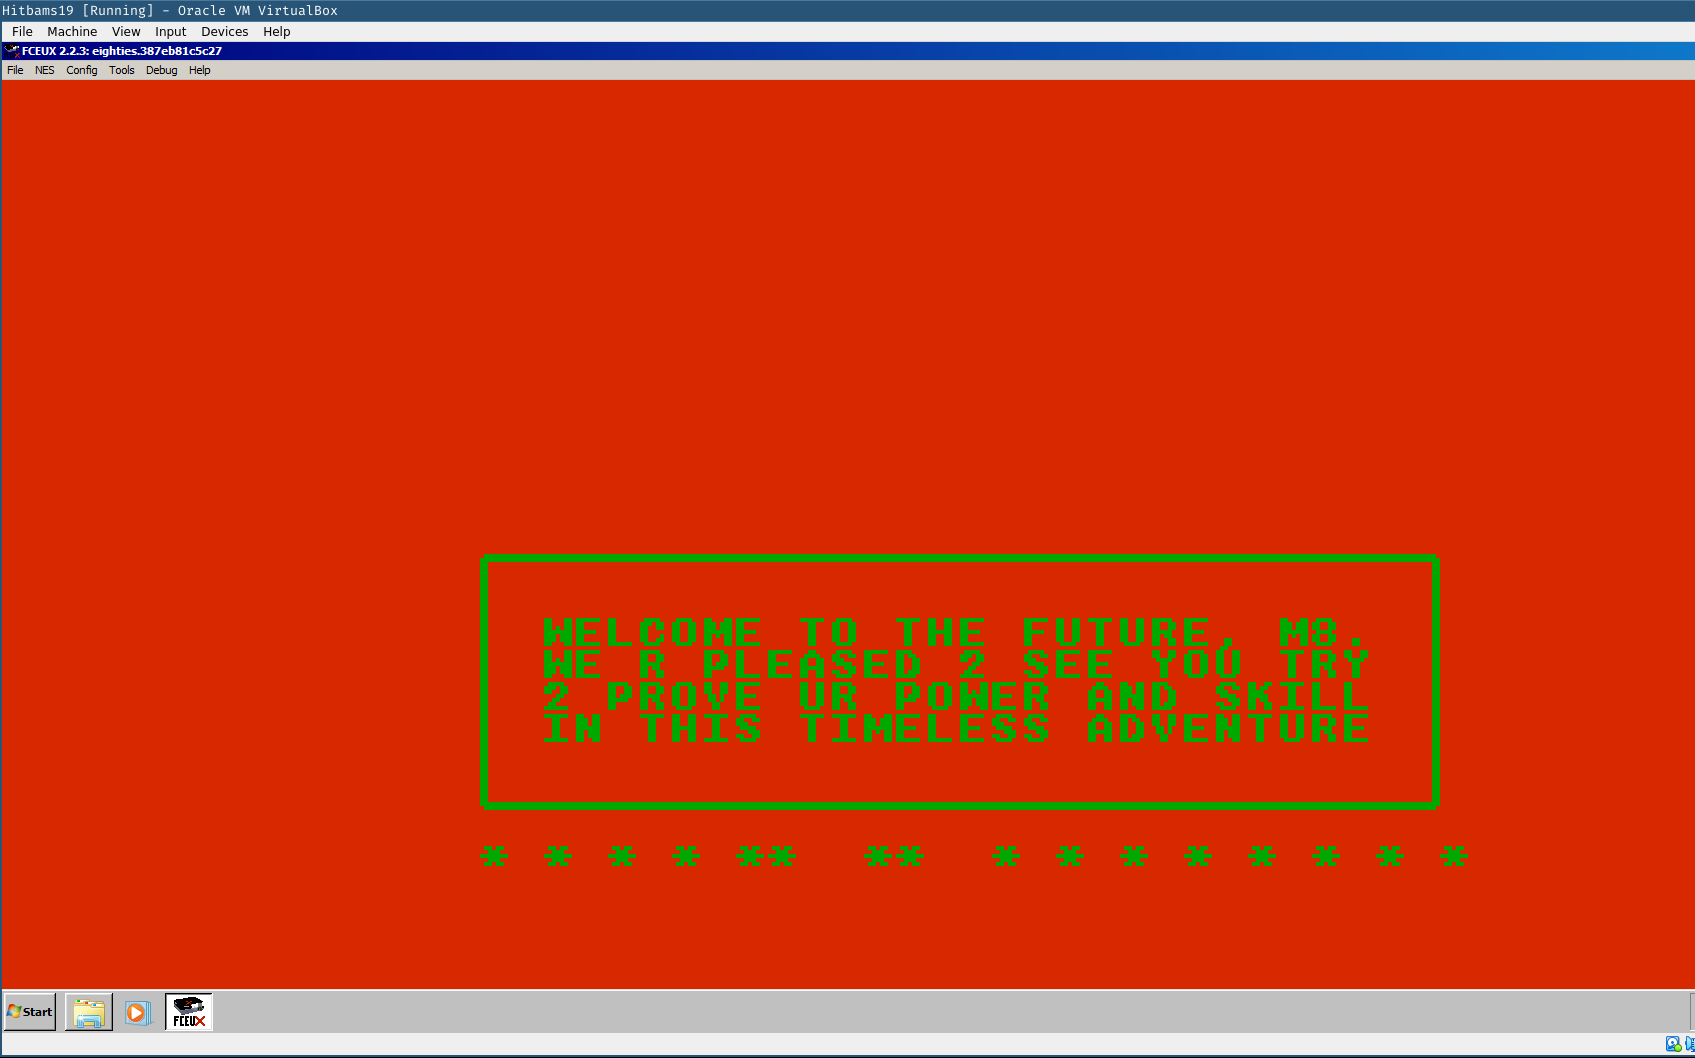
Pressing the keys mapped to the NES controller revealed that it expects some form of input from the controller. After 16 presses it present the following failed screen.
With the goal of the challenge clarified it is time to start reversing. For this challenge we used Binary Ninja. There is a community plugin that helps with loading NES ROMs for analysis. You can find the plugin here.
To understand the structure of the ROM we used the mini-graph for a quick overview. This quickly reveals some loops that are interesting. The first thing that got our attention was a XOR loop.
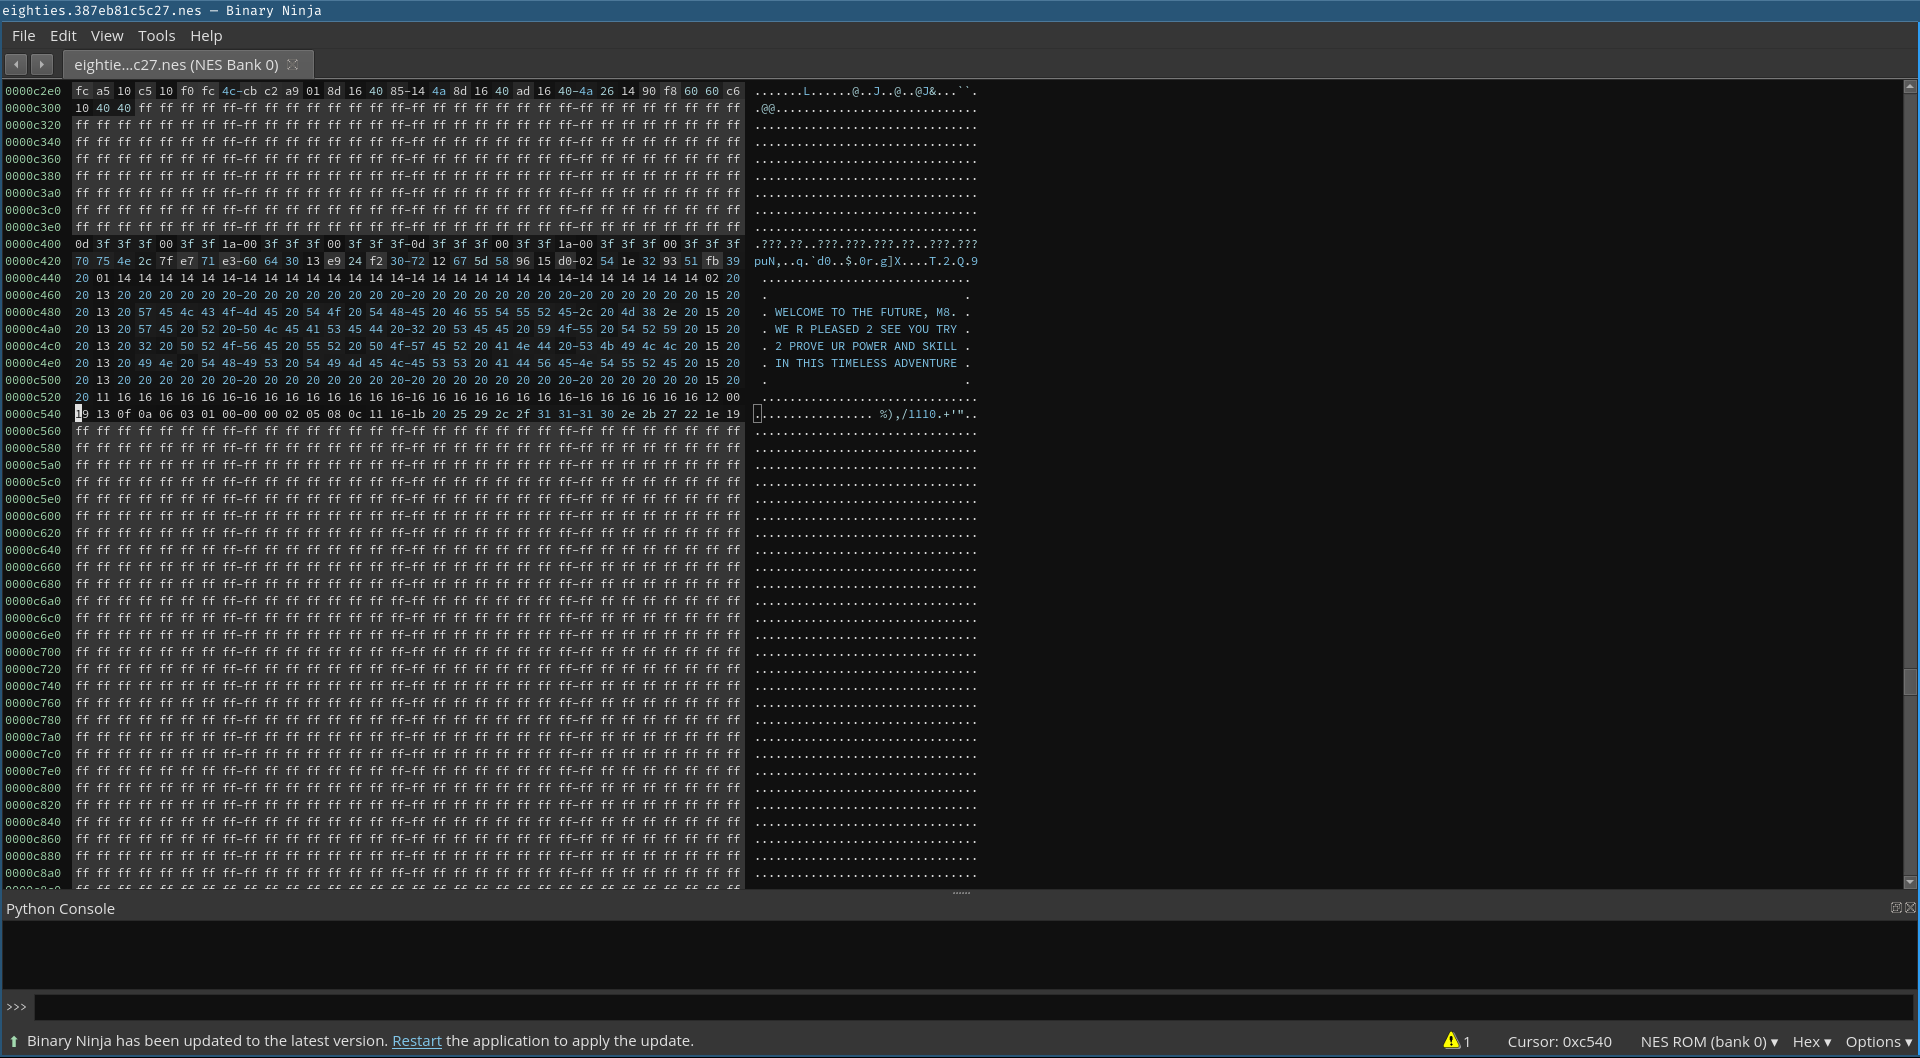
An array of bytes is XORed with the key 0x92 until a decrypted byte is zero. This indicates a zero-terminated string.

Binary Ninja provides us with common transformations that can be performed on data, including a basic XOR transformation.
So, by selecting the data from the referenced address 0xc440 up to the address containing the value 0x92 and applying the XOR transformation available through the context menu we discover that the XOR loop decrypts the message we are presented with when starting the ROM.
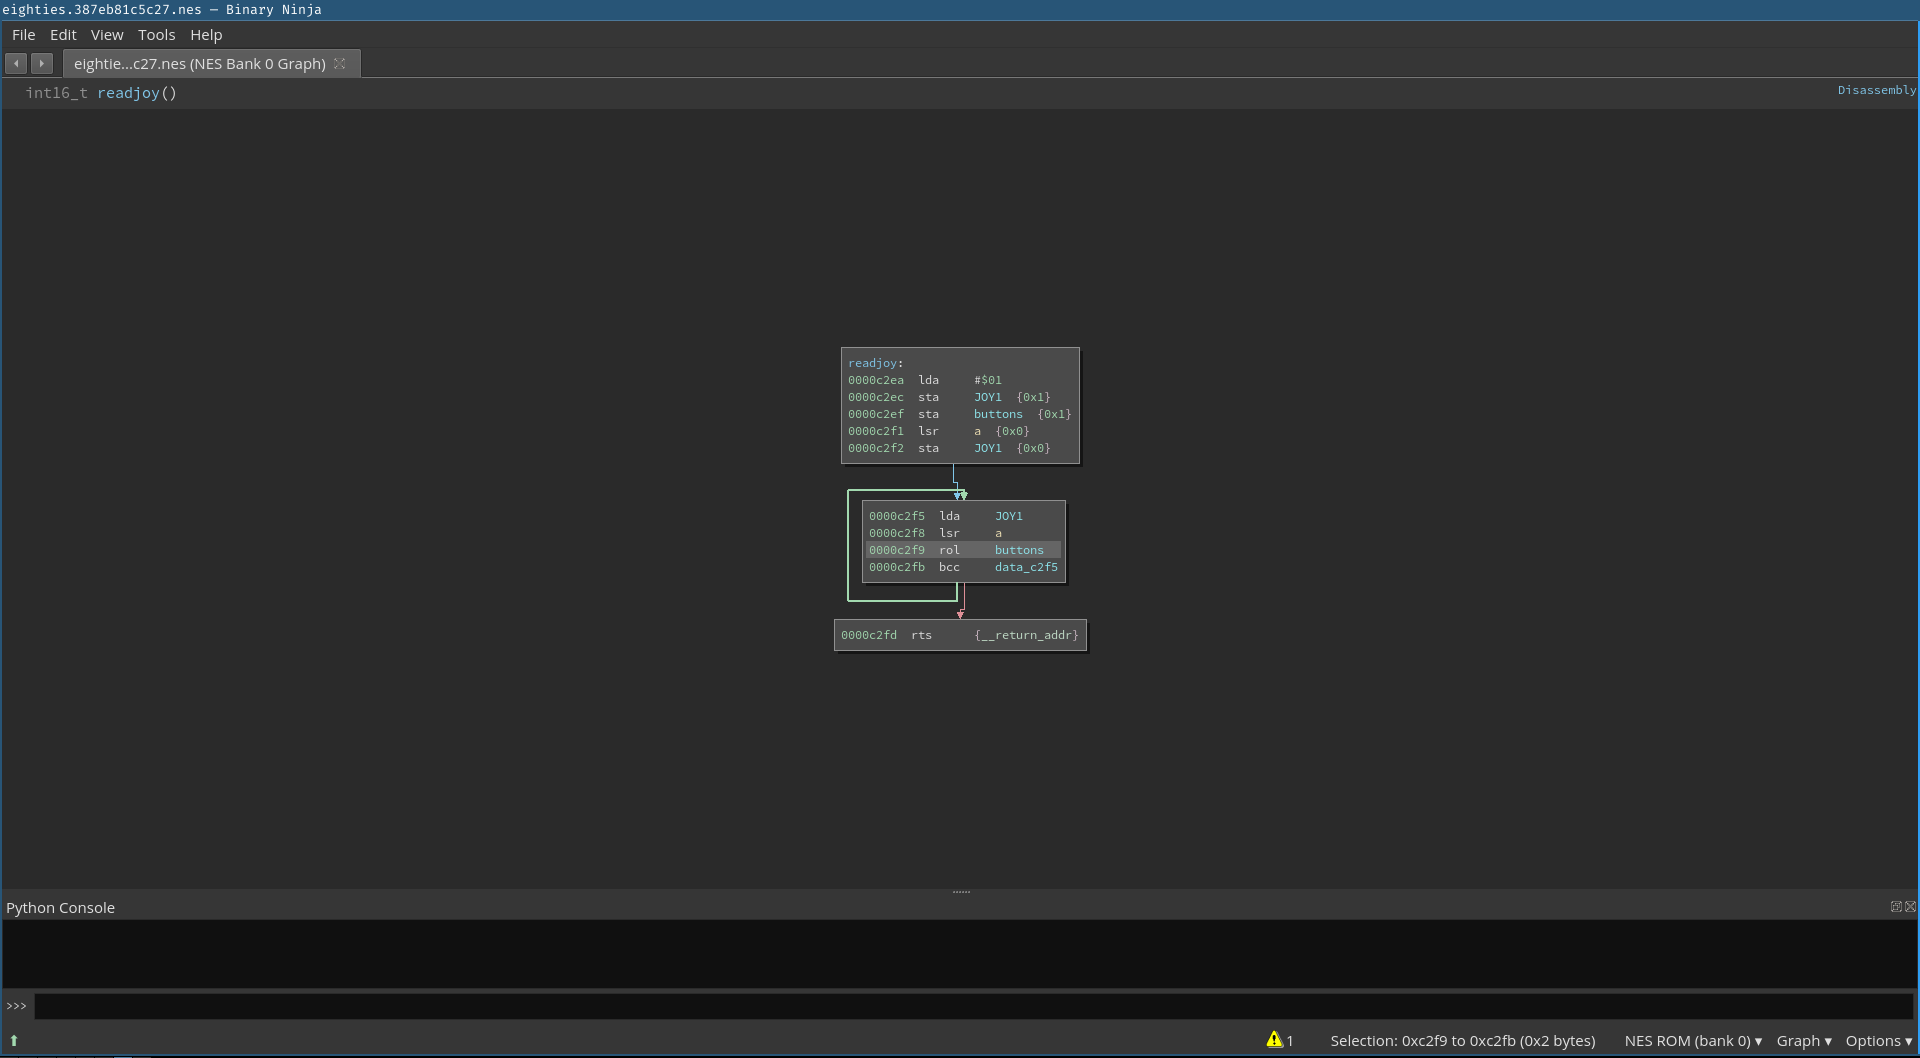
From there we continue with the reverse engineering process. We end up with a call to the function sub_c2ea that we follow to determine its function.
The next screenshot shows our annotated version, which we derived from the fact that the JOY1 symbol was involved.
A quick search query on how to read NES controller input revealed a snippet of assembly code that is equivalent to the disassembly listing we are seeing. For more information see this wiki page from the nesdev.com wiki.
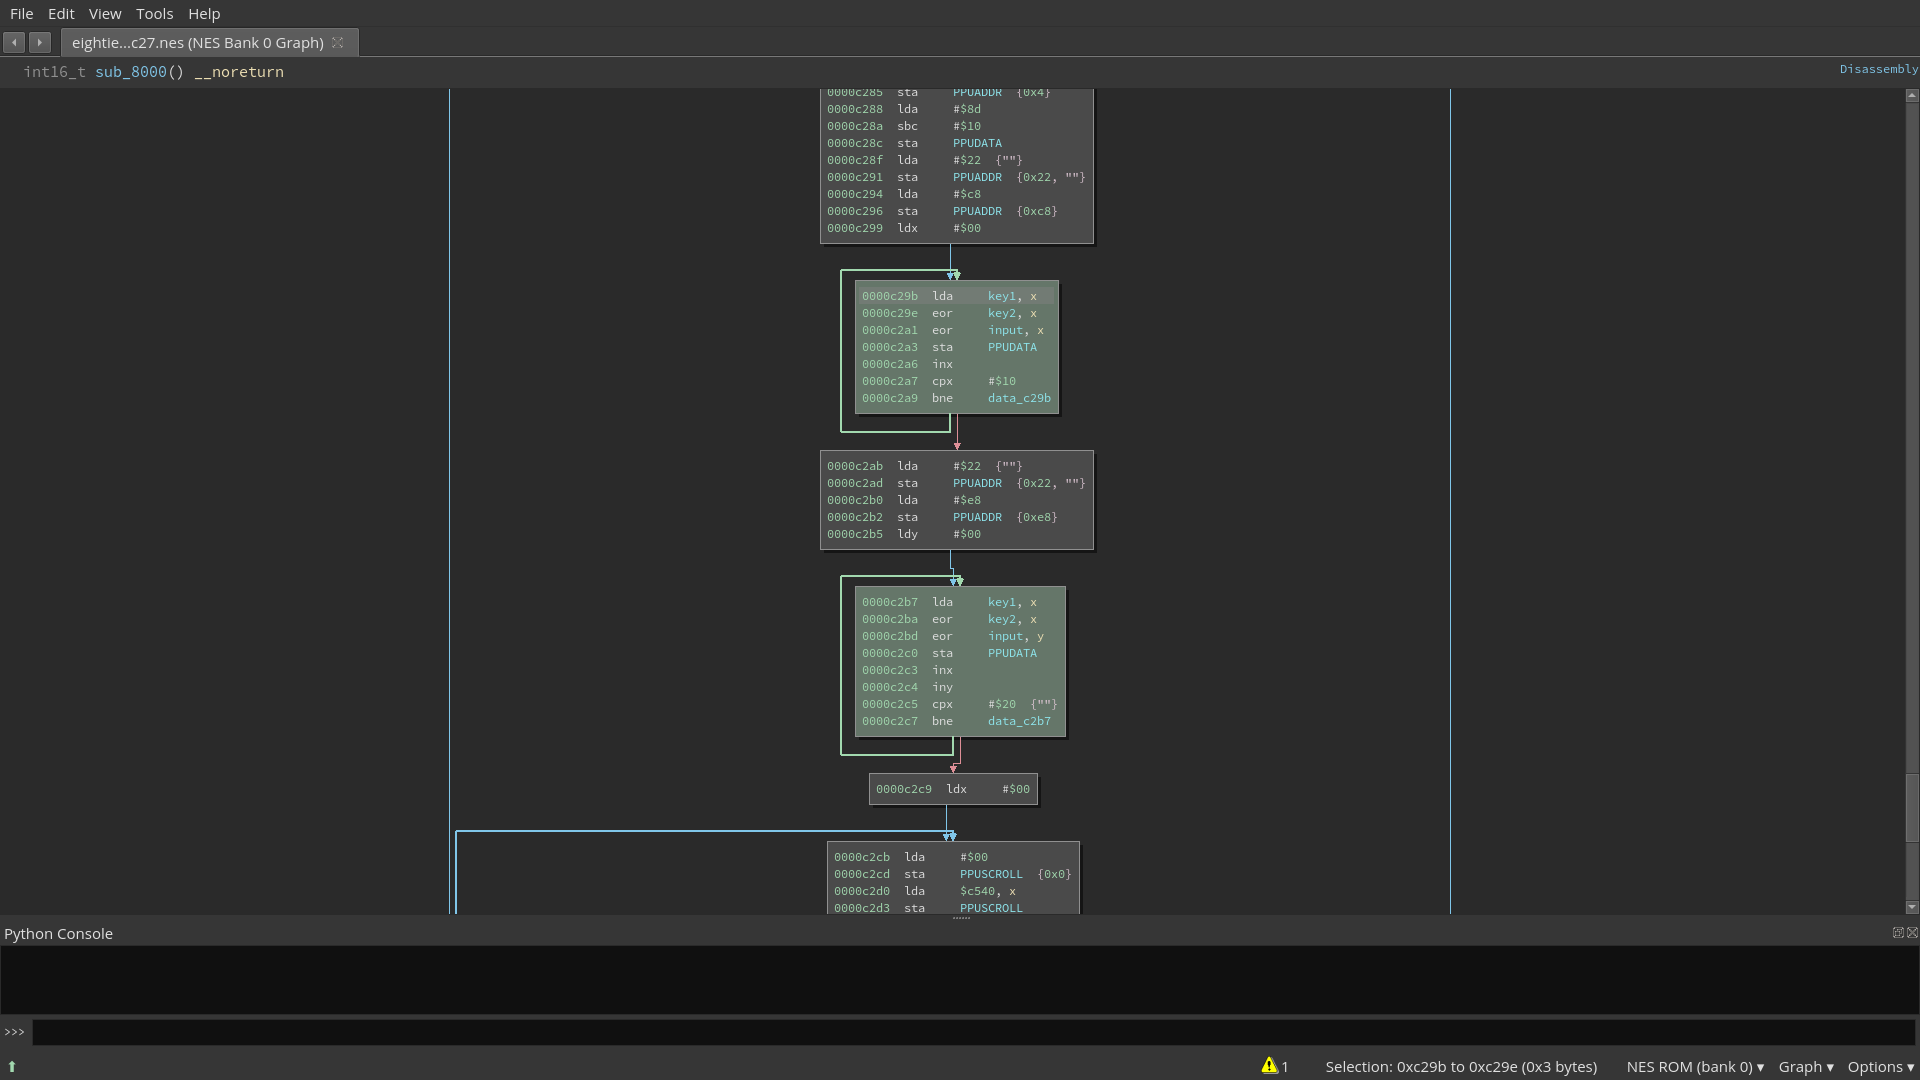
Next, we are presented with a loop that contains an inner loop that performs some kind of computation on the bits of the provided inputs.
It ends with a check of two values we named state1 and state2. The first state value state2 must be equal to 0x32 and the second state1 value must be equal to 0x43 (The naming doesn’t correspond to the check order, but it follows the initialization order).
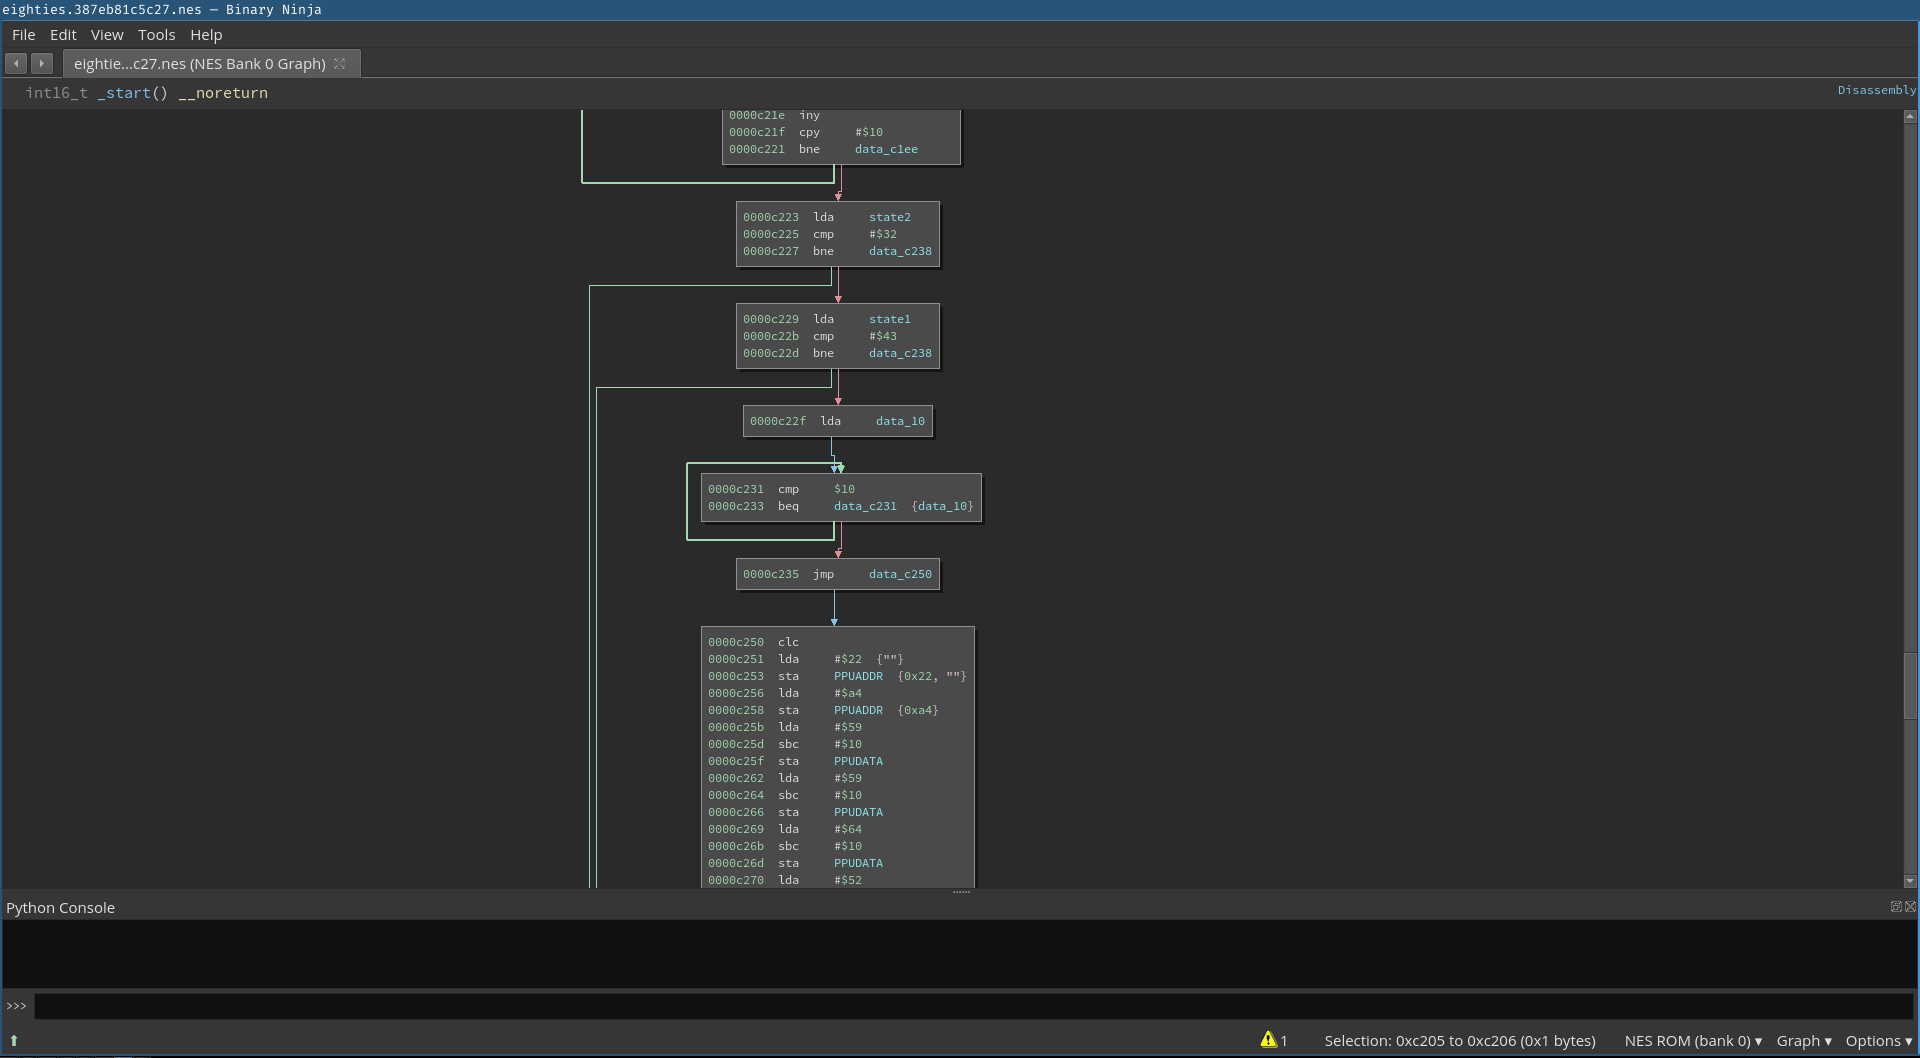
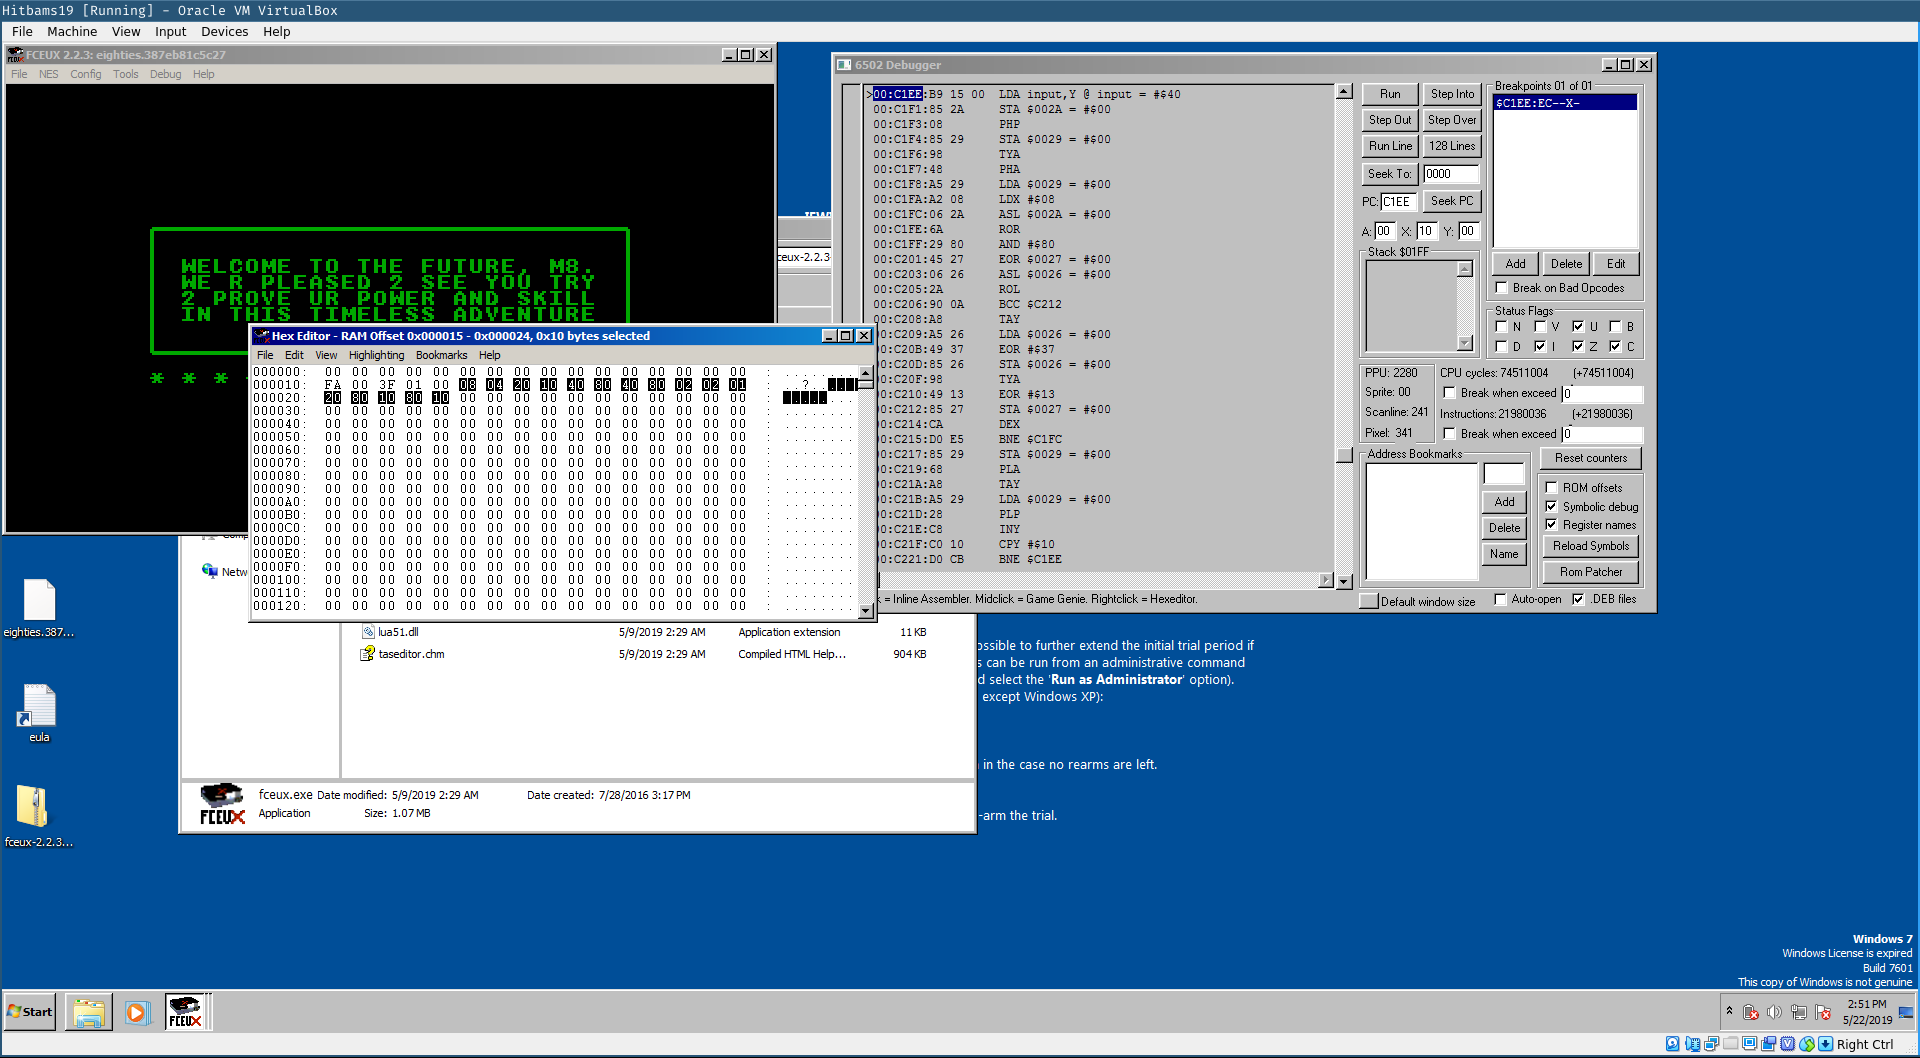
It seems that if our provided inputs result in these two values to be 0x32 and 0x43 we have provided the correct input. To quickly test this, we debugged the ROM by putting a breakpoint on the address 0xc223 where the states values are checked.
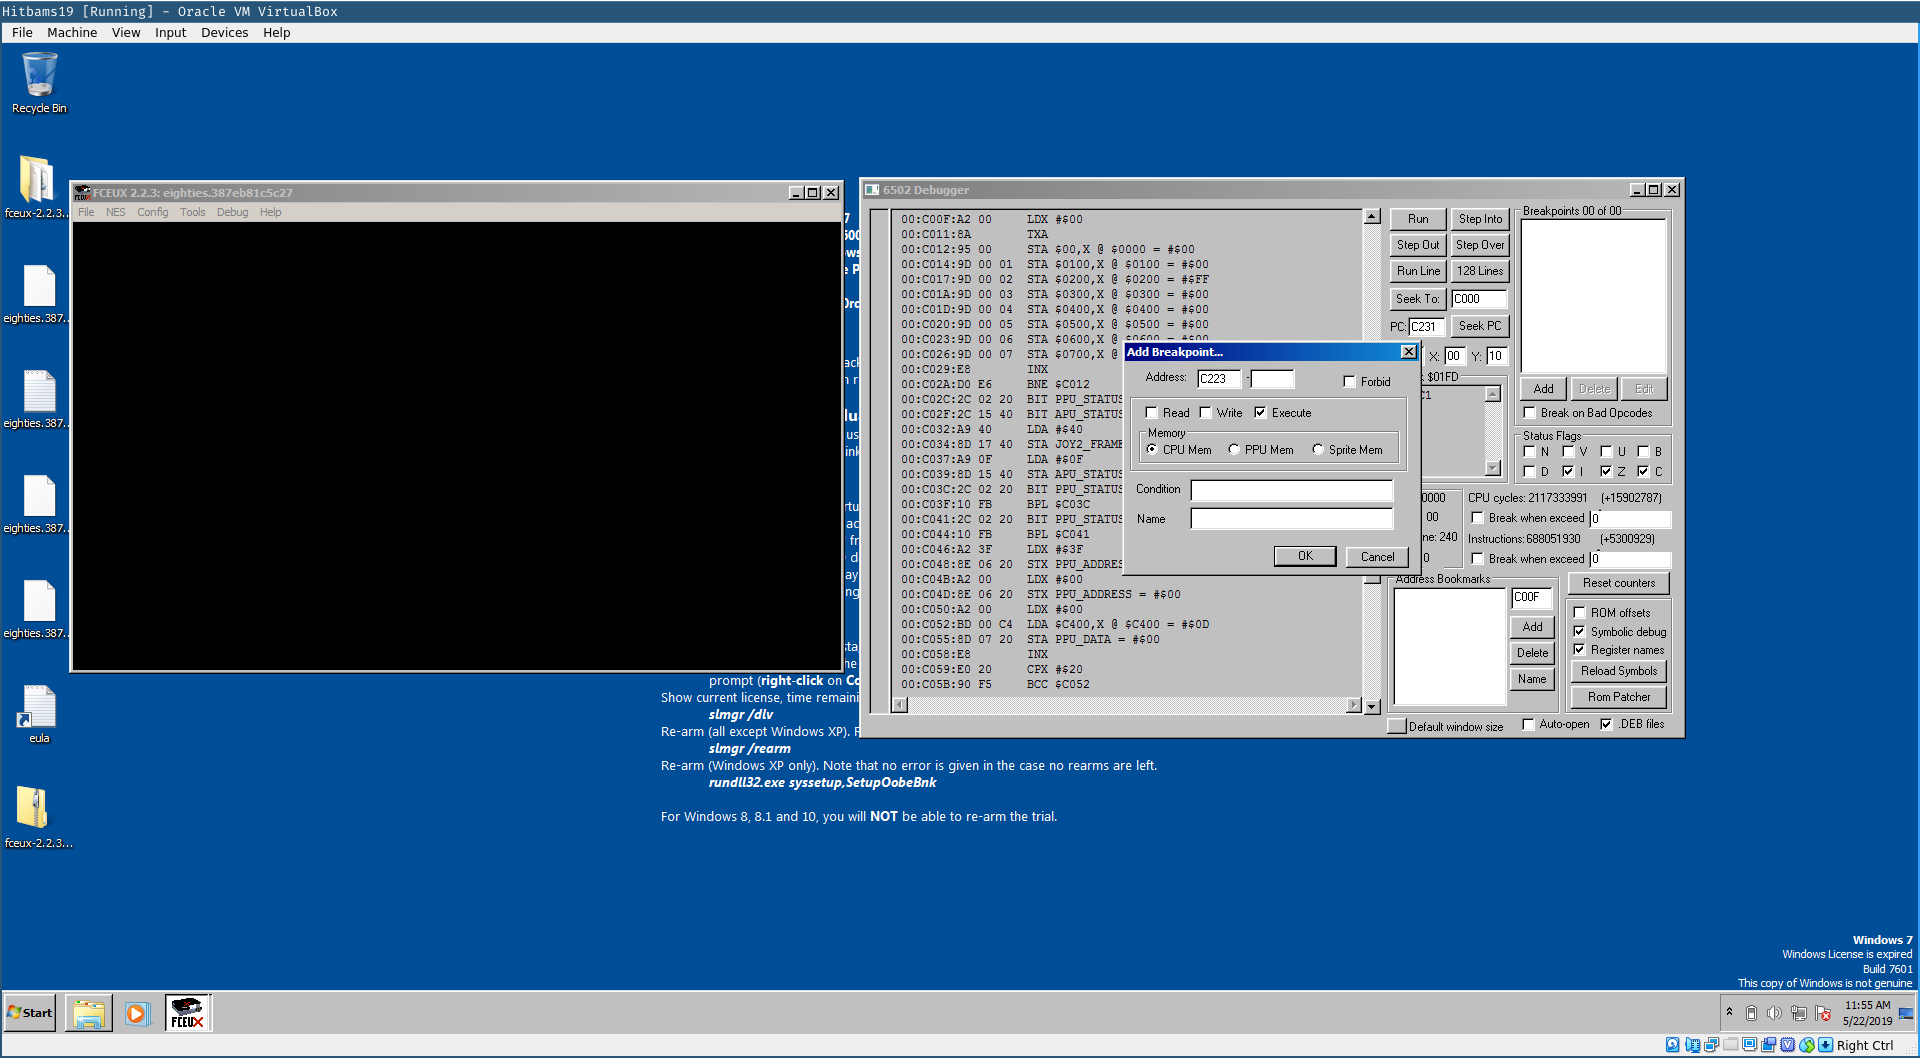
After we provided the input the breakpoint is triggered. At the breakpoint we can redirect the program counter the address 0xc22f that corresponds to the state values passing the checks.
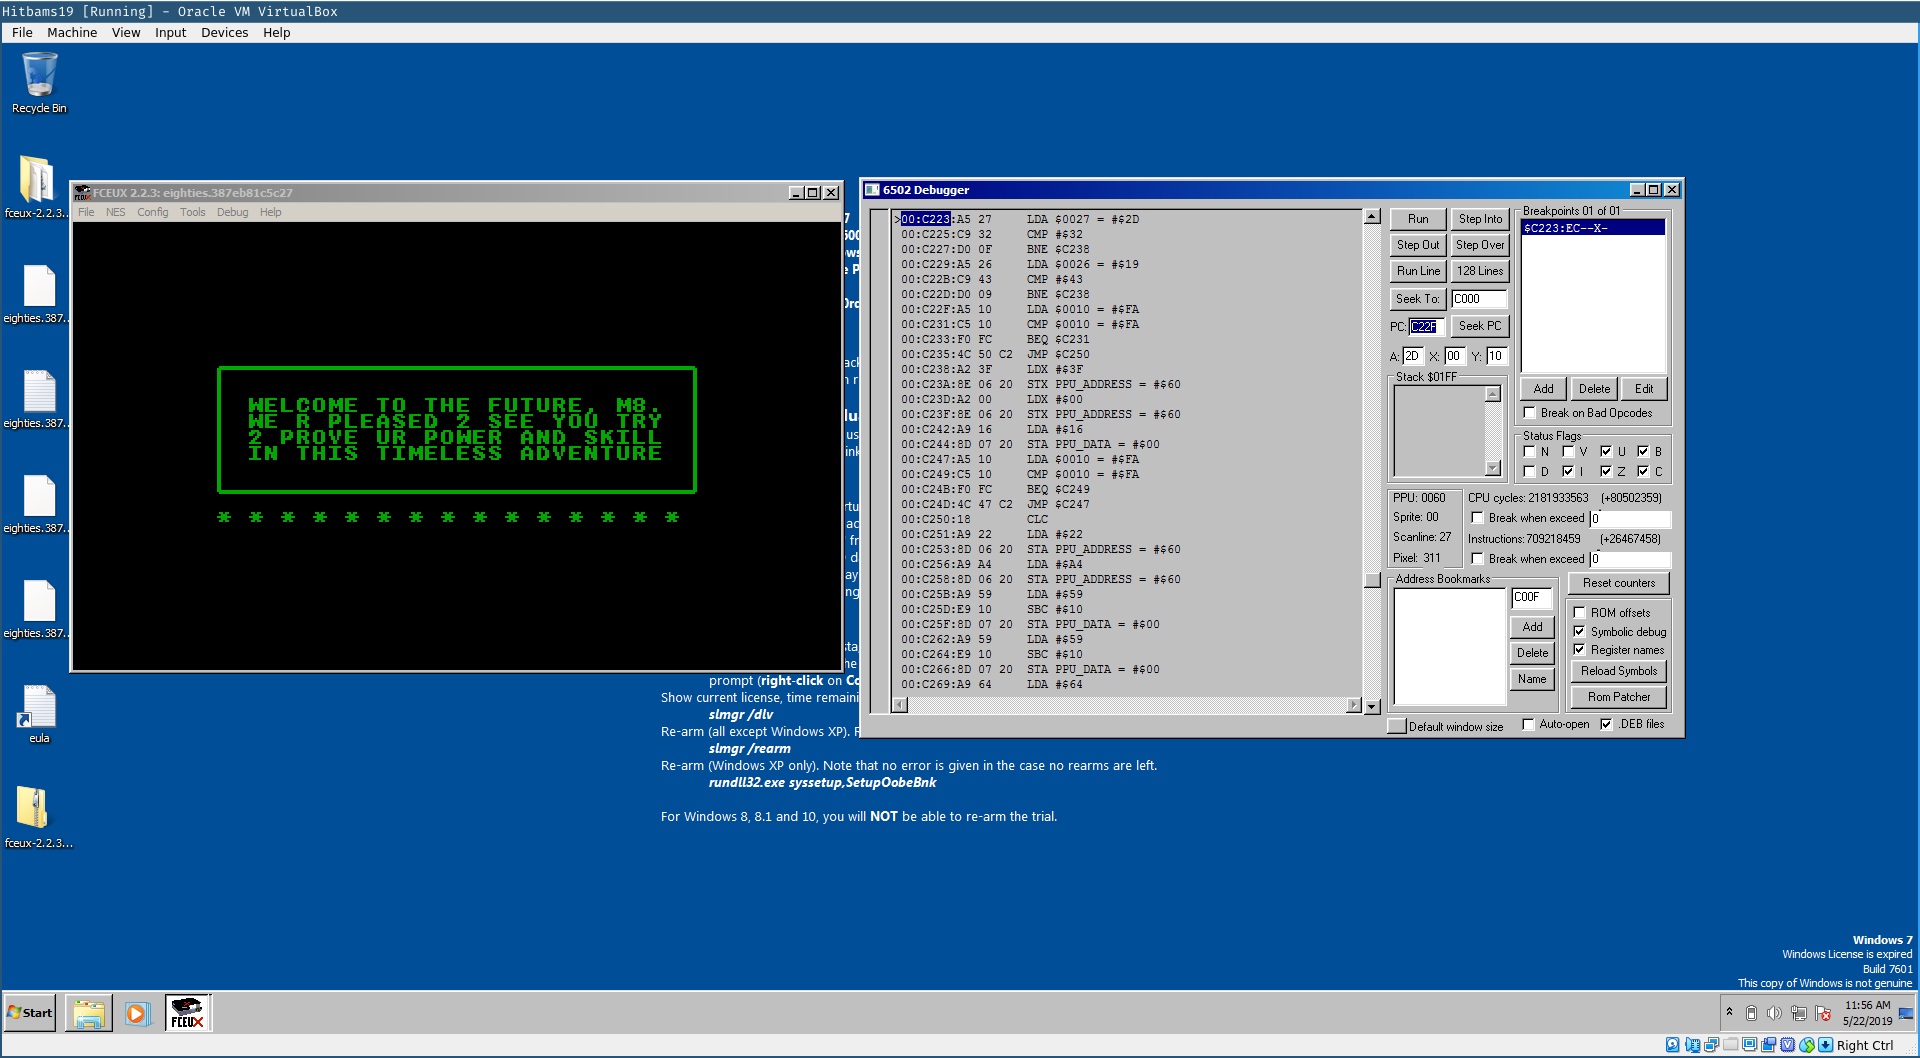
Continuing the execution of the ROM shows that indeed this is the branch we are looking for. We are presented with the flag screen that shows some garbage.
Continuing on the correct branch we discovered two additional loops that XORs our input with two additional data arrays. We renamed these to key1 and key2.
Both data arrays are 32 bytes in length and are XORed with our input in two passes.
So now we are left with the implementation of computing the state values so we can try to brute-force the input. We implemented the computation by porting the instructions to Python with help of the following instruction reference.
The following snippet shows the unoptimized translation.
def test_input(input):
    state1 = 0
    state2 = 0

    for i in range(0, 16):
        a = input[i]
        button_state1 = a
        button_state2 = a

        for j in range(8, 0, -1):
            # asl button_state1
            carry = (button_state1 & 0x80) >> 7
            button_state1 = (button_state1 << 1) & 0xff

            # ror a
            tmp = a
            a = (a >> 1) | (carry << 7)
            carry = (tmp & 0x1)

            # and #$80
            a = a & 0x80
            # eor state2
            a = (a ^ state2)

            # asl state1
            carry = (state1 & 0x80) >> 7
            state1 = (state1 << 1) & 0xff

            # rol a
            tmp = a
            a = ((a << 1) | carry) & 0xff
            carry = (tmp & 0x80) >> 7

            # bcc data_c212
            if carry != 0:
                # tay
                y = a
                # lda state1
                a = state1
                # eor #$37
                a = (a ^ 0x37)
                # sta state1
                state1 = a
                # tya
                a = y
                # eor #$13
                a = (a ^ 0x13)
            # sta state2
            state2 = a
        # sta button_state2
        # button_state2 = a

    return state1 == 0x43 and state2 == 0x32
When reimplementing low-level code in a higher-level language such as Python that doesn’t support typing it is important to ensure that operations resulting in a value that can increase the width of the variable holding the value are truncated accordingly. An example is the translation of the rol instruction where the 8th bit will shift into the 9th bit resulting in a 9-bit value instead of the expected 8-bit value if the 8th bit is set. We solve this with masking of the higher bits state1 = (state1 << 1) & 0xff.
Now that we have code to test the validity of an input we can start the brute-forcing. In theory we have 255^16, about 2^128, possible inputs. However, with some assumptions we can reduce the search space significantly.
Returning back to the decryption routine, that uses our input in combination with two keys that when provided the correct input will result in a flag, we can use knowledge of the flag format, a lower-case hex encoded string, to reduce the set of possible inputs. Each button state stored in a byte is XORed with the keys to result in a hex character. Therefore, we can determine which input bytes result in a hex character given the two keys using the following code.
def is_xdigit(c):
    return c in map(ord, "0123456789abcdef")

def possible_inputs():
    candidates = []
    for i in range(0,0x10):
        c1 = {n for n in COMBINATIONS if is_xdigit(n ^ key1[i] ^ key2[i])}
        c2 = {n for n in COMBINATIONS if is_xdigit(n ^ key1[i+0x10] ^ key2[i+0x10])}
        candidates.append(c1.intersection(c2))

    return candidates
The variable COMBINATIONS contains all the possible states (pressed buttons) one input byte can hold. Theoretically this can hold 255 values (all zero input means no buttons and is not registered as input).
Here we did another assumption, namely that only a single button press per input is required reducing the maximum states to 8 per input state.
Printing the possible inputs per input shows that the possible states are significantly reduced.
[{8}, {2, 4}, {32}, {64, 16}, {64}, {128}, {64}, {128}, {1, 2, 4}, {1, 2}, {1, 2, 4}, {32}, {128}, {16}, {128}, {16}]Now we only have to brute-force 72 possible combinations!
What remains is testing our assumptions using a simple loop.
for input in product(*possible_inputs()):
if test_input(input):
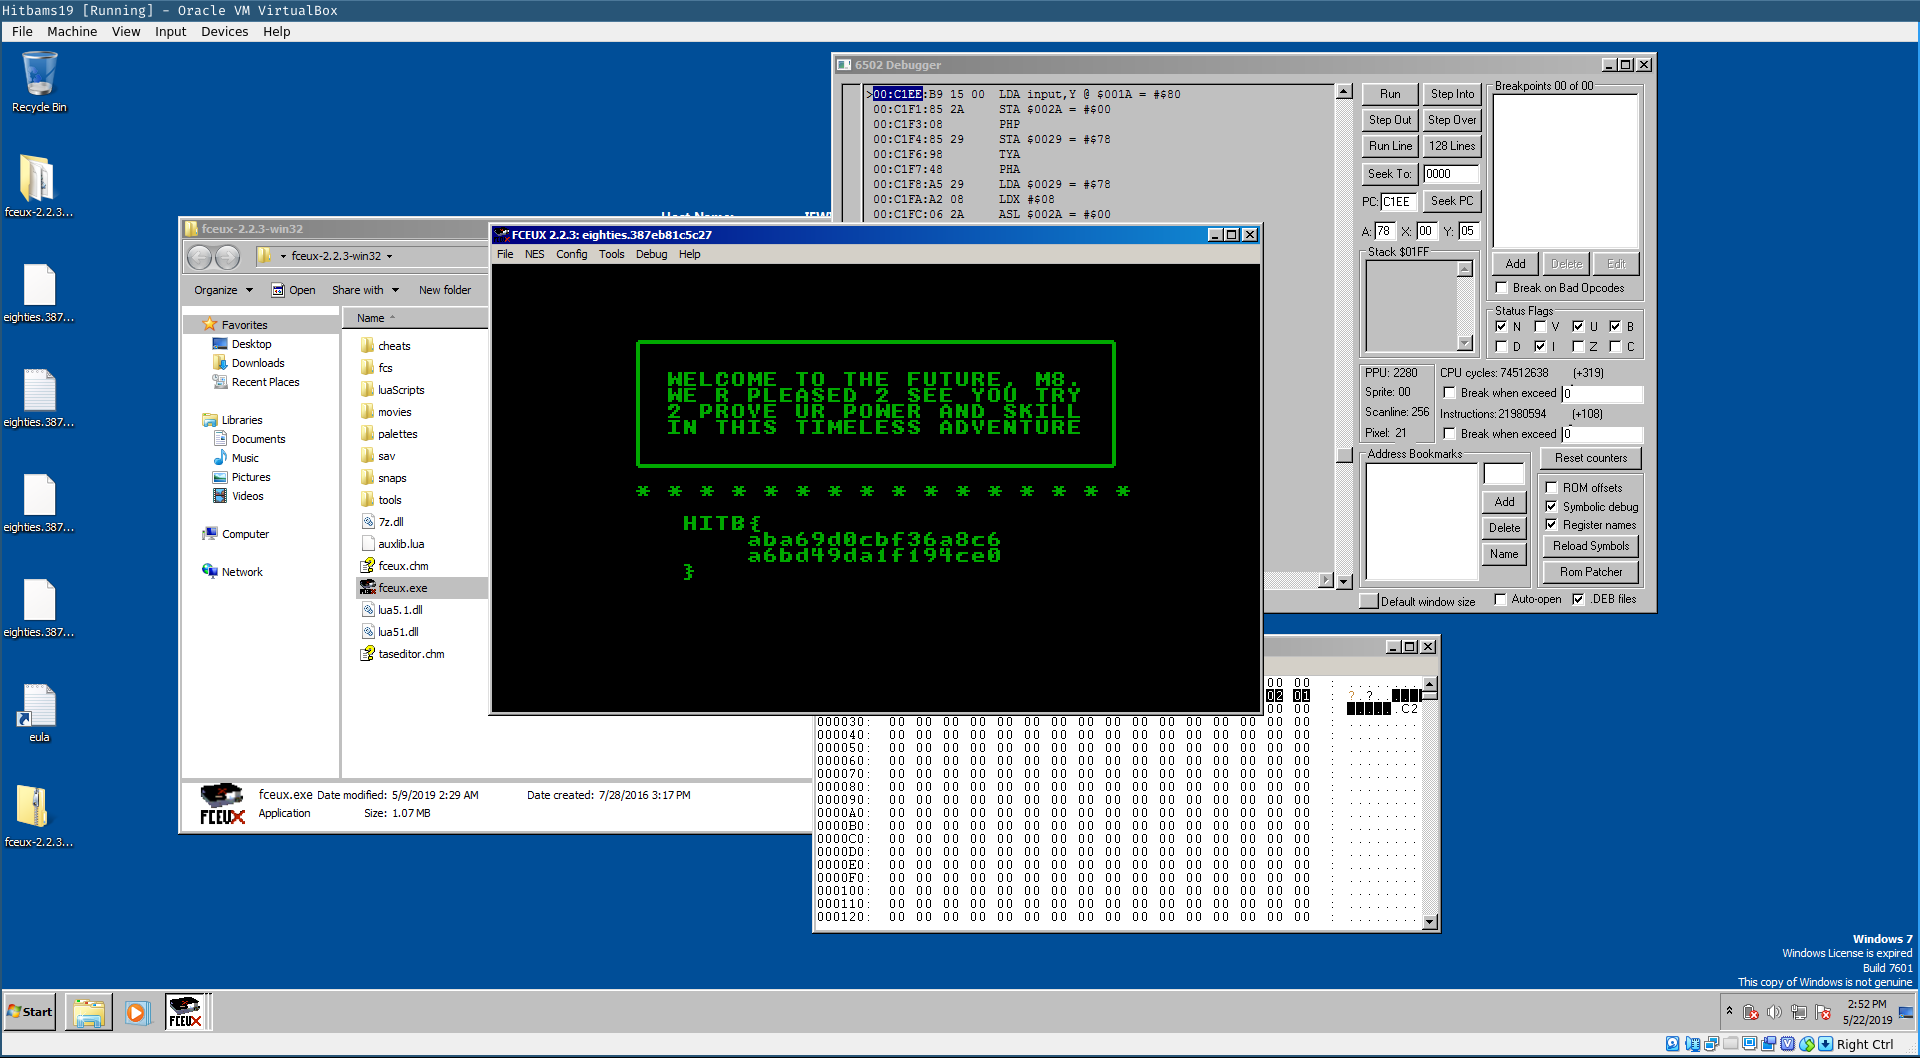
print_flag(input)This provided us with the following flag HITB{aba69d0cbf36a8c6a6bd49da1f194ce0}
A quick run in the emulator by setting a breakpoint on the address 0xc1ee, just before our input is validated, and replacing our supplied input with the brute-forced input using the hex editor, reveals that we have found the correct flag.
Our complete solution can be downloaded here.
A word of thanks
First of all, we want to thank the HITBAMS CTF crew for a great CTF and in particular Blasty for a nice binary challenge.
Last, but not least, our employer Securify for allowing us to participate during work time! Allegedly, they are hiring ;).